The Single Mom Life

A way for single moms to connect, relax, and have an adventure!

Social

  • Email
  • Facebook
  • Instagram
  • Pinterest
MENU
  • Home
  • Blog
  • Reviews
  • Books
  • Contact Info

Share Buttons

Share on facebook
Facebook
Share on pinterest
Pinterest
Share on twitter
Twitter
Share on linkedin
Linkedin

Homestyle Meatloaf

Here’s a great recipe that any kid will love! It’s a great recipe to have in the middle of the colder seasons. You can add mashed potatoes or grilled veggies to make it a complete meal.
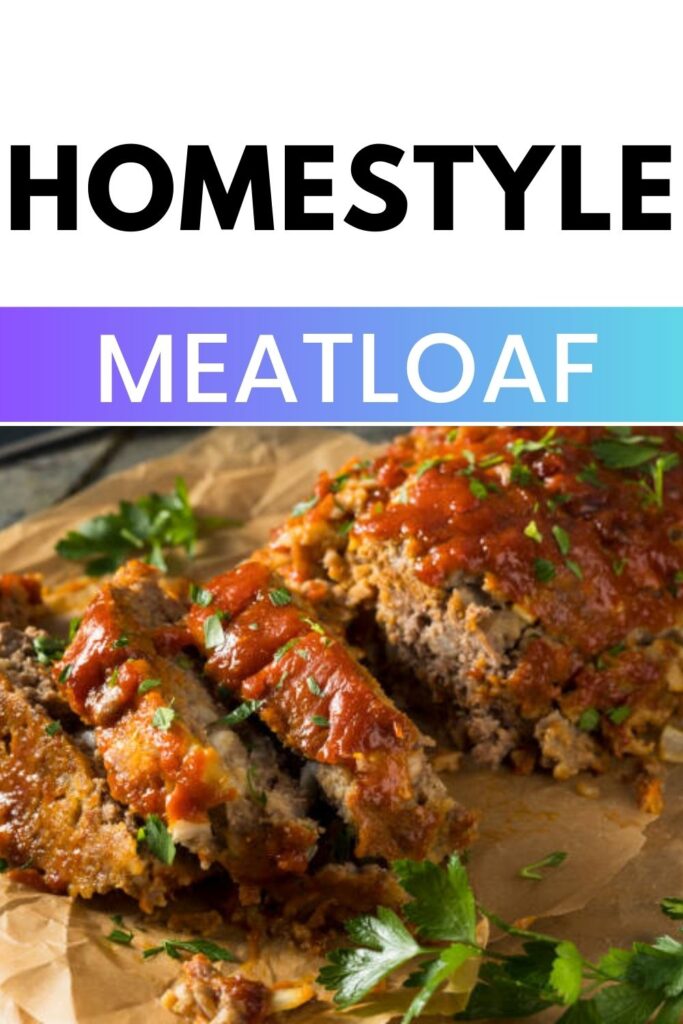
Home Style Meatloaf

Home style meatloaf is a great recipe just for any night of the week. Your kids will love it!
Print Recipe
Prep Time 2 hours hrs 30 minutes mins
Course Main Course
Cuisine American

Equipment

  • 1 Large Mixing bowl
  • 2 Small Mixing bowl
  • 1 Meatloaf Pan
  • 1 Cutting Board
  • 1 Knife
  • 1 Mixing Spoon

Ingredients
  

  • 1 ½ Pounds Ground Beef
  • 1 ½ Pounds Ground Pork
  • 1 Cup Breadcrumbs
  • ½ Cup Milk
  • 1 Onion, finely chopped
  • 1 Garlic Cloves Minced
  • 1 Eggs
  • 1 tsp Salt
  • ½ tsp Black Pepper
  • 1 tsp Dried Thyme
  • 1 tsp Dried Oregano
  • ½ tsp Paprika
  • ⅓ Cup Ketchup

Glaze

  • ½ Cup Ketchup
  • 2 Tbsp Brown Sugar
  • 1 Tbsp Worcestershire sauce
  • 1 tsp Yellow Mustard

Instructions
 

  • Preheat your oven to 350°F (175°C).
  • In a large mixing bowl, combine the ground beef and ground pork.
  • In a separate small bowl, mix the breadcrumbs and milk together until the breadcrumbs are moistened.
  • Add the breadcrumb mixture to the meat and mix well.
  • Add in the chopped onion, minced garlic, eggs, salt, black pepper, dried thyme, dried oregano, paprika, and ⅓ cup of ketchup. Mix everything together until well combined.
  • Shape the meat mixture into a loaf shape and place it in a baking dish.
  • In another small bowl, whisk together ½ cup of ketchup, brown sugar, mustard, and Worcestershire sauce to make the glaze.
  • Spread about half of the glaze over the top of the meatloaf.
  • Place the meatloaf in the preheated oven and bake for about 45 minutes to 1 hour, or until the internal temperature reaches 160°F (71°C).
  • During the last 15 minutes of baking, brush the remaining glaze over the top of the meatloaf.
  • Once the meatloaf is fully cooked, remove it from the oven and let it rest for a few minutes before slicing.
  • Slice and serve the meatloaf with your favorite side dishes, such as mashed potatoes, roasted vegetables, or a green salad.

Notes

Enjoy your delicious homestyle meatloaf!
Remember, cooking times can vary depending on your oven and the thickness of the meatloaf, so it’s always a good idea to use an instant-read thermometer to ensure it’s fully cooked.
Keyword american, dinner, meatloaf

Here’s a great recipe just for you! Enjoy!

Sign up for a free gift below!

Stay Cool and Healthy: 5 Refreshing and Nutritious Summer Snacks for Kids

Summer is here, and with the rising temperatures, it’s important to keep our kids cool and well-nourished. While sugary treats might seem appealing, they can lead to energy crashes and unhealthy habits. Instead, why not opt for refreshing and nutritious snacks that will not only satisfy your kids’ taste buds but also provide them with the essential nutrients they need to stay active and strong? Here are five delightful summer snacks that your kids will love. These snacks are fun and will have your kids loving the adventure of snacking while they play.

  1. Fruit Kabobs with Yogurt Dip: Turn snacking into a fun activity by preparing colorful fruit kabobs. Thread chunks of watermelon, strawberries, kiwi, and pineapple onto skewers for a vibrant treat. To add a protein boost, serve the kabobs with a side of Greek yogurt dip. Greek yogurt is rich in calcium and protein, while the assortment of fruits provides vitamins, antioxidants, and hydration to keep your kids energized throughout the day. Have your kids find their favorite fruits and make them ahead of time. Have them refrigerated so that by the time they are eaten they are nice and cold on the hot and warm day.

2. Frozen Banana Pops: Create a healthier alternative to ice cream with frozen banana pops. Simply cut bananas in half, insert popsicle sticks, dip them in melted dark chocolate, and roll them in crushed nuts or coconut flakes. Freeze until the chocolate hardens, and you’ll have a delectable treat that’s not only cool but also packed with potassium, fiber, and healthy fats. Have the kids help dip the bananas in chocolate they will love the fun activity and it will help them to take some ownership in food that they are consuming.

3. Cucumber and Hummus Bites: Cucumbers are composed mainly of water, making them an excellent hydrating option for hot summer days. Slice cucumbers into rounds and top each with a dollop of hummus. Hummus is a nutritious source of protein and healthy fats. Add a sprinkle of herbs or a dash of paprika for extra flavor. This crunchy and satisfying snack is perfect for keeping kids refreshed and full between meals. For an added fun project you can even grow your own cucumbers and teach your kids how to grow their own snacks!

4. Berry Parfait: Layered berry parfaits are not only visually appealing but also incredibly tasty. Alternate layers of mixed berries, low-fat yogurt, and granola in a glass. Berries are bursting with vitamins and antioxidants, while yogurt provides probiotics for a healthy gut. Granola adds a satisfying crunch and some whole grains for sustained energy. Let your kids assemble their own parfaits for an interactive and nutritious snack time. Have your kids pick their favorite fruit to add to the parfait and enjoy it with them!

5. Watermelon Slushies: Nothing says summer like a refreshing slushie. Blend chunks of juicy watermelon with a splash of lime juice to create a naturally sweet and hydrating beverage. You can also freeze the mixture into popsicle molds for a frozen treat. Watermelon is high in water content and contains vitamins A and C, making it a perfect choice to beat the summer heat. To involve your kids in the process have them help you pick out the watermelon at the store. Watermelons are a staple of summer treats this is a fun creative way to serve it up in a different way.

This summer, prioritize your kids’ health and happiness with these five refreshing and nutritious snack ideas. By incorporating a variety of colorful fruits, hydrating veggies, and protein-rich options, you’ll not only keep them cool and satisfied but also provide them with the nutrients they need to thrive during the sunny season. So, ditch the sugary treats and embrace these wholesome alternatives for a joyful and healthy summer for your little ones.

Sign up Below for Free Gift!

Copycat La Terra Fina Spinach Artichoke Parmesan Dip Recipe (Costco)

Here’s a great copycat recipe that my sister come up with for those who love artichoke, spinach, and Parmesan this is the recipe for you. It’s great because served warm it’s just like having a hug on the inside on a cold day!

Copycat La Terra Fina Spinach Artichoke Parmesan Dip Recipe (Costco)

Here's a great recipe that you are going to love that's a copy cat of what you would find at Costco. Enjoy this amazing recipe!
Print Recipe
Prep Time 40 minutes mins
Cook Time 14 minutes mins
Course Appetizer
Cuisine American
Servings 6

Equipment

  • 1 Mixing Bowl
  • 1 Baking dish (glass or ceramic)
  • 1 Mixing Spoon
  • 1 Knife
  • 1 Cutting Board

Ingredients
  

  • 1/2 14 oz Can of artichoke hearts drained & chopped
  • 1/2 Cup Frozen spinach thawed, drained, finely diced or you can use freshly chopped spinach
  • 1/4 Cup Onion finely diced
  • 4 oz Cream cheese softened
  • 1/3 Cup Plain greek yogurt (Heaping to almost over flow is good)
  • 1/3 Cup Mayo (Heaping to almost over flow is great)
  • 1/2 Cup Monterey jack cheese shredded
  • 1/4 Cup Parmesan cheese finely shredded or grated
  • 1/2 tsp Salt to taste
  • 1 tsp Minced garlic

Instructions
 

  • Preheat oven to 350℉- you can also warm up the cream cheese in the oven during this time keep an eye on it and keep it in the wrapper while warming. When it is soft to the touch you can remove the cheese.
  • In a mixing bowl stir all ingredients togather. Once all ingredient are very well incorporated place mixture into a oven safe baking dish.
  • You can sprinkle some extra parmesan cheese on top. Place dish in oven and bake for 20 minutes.
  • Once finished allow it to cool for a time and serve with your favorite chip or bread!

Notes

Here’s a great appetizer that you are going to want to serve at your next family holiday! It’s a simple and downright delicious Spinach, artichoke, and parm dish. Enjoy! 
Keyword appitizers, artichoke, dip, parmesan, parmesan bagels, spinach

Check out some homemade sourdough pretzels that are a great addition to the dip!

Sign up for the Free Gift Below!

Beat the Boredom: 7 Engaging Indoor Games and Activities for Rainy Summer Days

Summer is usually a time for outdoor adventures, but on those rainy days, staying indoors can become a bit dull and tiresome. However, don’t let the rain dampen your spirits! Embrace the cozy atmosphere indoors and turn those gloomy days into moments of joy and excitement with these seven engaging indoor games and activities. Whether you’re spending time with family, friends, or by yourself, these activities will surely make your rainy summer days unforgettable.

  1. Board Game Bonanza

Nothing beats the timeless charm of board games. Gather around the dining table and delve into a world of strategy, luck, and competition. From classic games like Monopoly and Scrabble to modern favorites like Settlers of Catan and Codenames, there’s a board game for every age and interest. Unleash your inner strategist or wordsmith and enjoy some healthy competition with your loved ones. Board games are great for kids to learn how to think strategically and learn how to play well with others. This is a great way to spend a rainy summer day when they can’t go outside. Games provide a great way for kids to get off of screens and learn how to do relationships in person. Here’s a great game for kids called Sorry: Check it out!

  1. Indoor Treasure Hunt

Transform your home into an exciting adventure zone by organizing an indoor treasure hunt. Create clues that lead to hidden treats or small surprises scattered throughout the house. This activity is perfect for families with young children, fostering creativity, problem-solving skills, and a lot of giggles. Make the final prize something worth the search to keep everyone motivated! You can get creative with where you hide clues. Have some of the kids help you create the treasure hunt. Make the prize at the end something fun or silly for all the kids to enjoy! Here’s an already set up for you kit.

  1. DIY Craft Marathon

Indoor days are ideal for unleashing your creative side. Gather various craft supplies and set up a DIY craft station. From painting and drawing to making friendship bracelets or paper crafts, the possibilities are endless. You can find plenty of DIY craft ideas online or let your imagination run wild and create something unique. At the end of the day, you’ll have wonderful handmade creations to cherish or gift to friends and family. Kids will love to create crafts and display them around your home. It’s a great way for them to get creative and it will also help with problem solving. Here’s a great kit for your kids to check out!

  1. Indoor Picnic and Movie Marathon

Turn a rainy day into a cozy indoor picnic. Lay out a blanket in the living room, prepare some finger foods like sandwiches, fruits, and popcorn, and gather around for a movie marathon. Pick your favorite films or explore new genres together. Whether it’s a series of classic movies or the latest releases, spending the day snuggled up together will create beautiful memories. This activity is so fun for the family especially when you get to stay in your PJ’s all day and just spend the day on the couch. This is also a great idea when someone in the family is sick. You can make it more interesting by picking movies that all start with a certain letter. Here’s a cute basket that your kids can help you pack. Make a big deal and have them choose the food for the picnic! There are so many ideas and directions you can go with this one.

  1. Virtual Trivia Night

Get your friends and family involved in a virtual trivia night. With numerous apps and websites available, you can easily set up and customize your own trivia game. Split into teams and challenge each other with a variety of questions spanning different topics. It’s an excellent way to test your knowledge, learn new facts, and share a lot of laughter in the process. This idea is for kids that are a bit older and can retain facts about the culture and what’s going on in the world today. Here’s an app you can check out!

  1. Cooking or Baking Challenge

Rainy days are perfect for experimenting in the kitchen. Organize a cooking or baking challenge with your family or friends. Choose a theme, set a time limit, and let the creativity flow! You can create unique dishes or try to replicate some of your favorite recipes. At the end of the challenge, sit down together and enjoy the delicious results. You can also choose a country and cook some of the famous foods from that country. This can expose your kids to different cultures and maybe help to expand their palate. Here’s a cute set of kitchen utensils for kids you can check out!

  1. Virtual Museum Tours

Travel the world from the comfort of your home by embarking on virtual museum tours. Many renowned museums offer online tours, allowing you to explore art, history, and culture without leaving your couch. It’s an educational and entertaining activity for both kids and adults. You can also play a game with your kids where you have them look out for one thing in the museum. As soon as they spot it they can get a point. Whoever gets the most points wins!

Don’t let rainy summer days get you down! Embrace the indoor opportunities and turn them into moments of joy and bonding. From board games and treasure hunts to creative crafts and virtual adventures, there are plenty of engaging activities to keep you entertained during the rain. So, the next time the clouds gather, remember these seven indoor games and activities to beat the boredom and make your summer days extraordinary. Your kids will love the memories that are made from these moments!

Sign up for Free Gift below!

Homemade Sourdough Soft Pretzel

It’s such a fun journey when you go on the sourdough rabbit hole. I’m loving all the sourdough recipes that I’ve tried. Here’s one of my favorites!

Sour Dough Soft Pretzel

Here's a great sourdough soft pretzel recipe! Love your sour dough journey!
Print Recipe
Prep Time 2 hours hrs
Course Appetizer
Cuisine American

Equipment

  • 1 Mixing Bowl

Ingredients
  

  • 100 grams Active Sourdough Starter
  • 200 grams All Purpose Flour or Bread Flour
  • 200 ml Luke Warm Water

For the Pretzel Dough

  • 400 grams All- Purpose Flour or Bread Flour
  • 1 tsp Salt
  • 1 Tbs Sugar
  • 120 ml Luke Warm Water
  • 2 Tbs Unsalted Melted Butter
  • 1/4 Cup Baking Soda (for Boiling)

For Topping (Optional)

  • Course Sea Salt
  • Sesame Seeds
  • Poppy Seeds
  • Shredded Cheese

Instructions
 

  • Prepare the sourdough starter:Mix 100g active sourdough starter with 200g all-purpose flour and 200ml lukewarm water in a bowl. Cover it loosely and let it sit at room temperature for about 4-6 hours or until it's doubled in size and bubbly.
  • Making the pretzel dough:In a large mixing bowl, combine 400g all-purpose flour, 1 teaspoon salt, and 1 tablespoon sugar. Add the activated sourdough starter, 120ml lukewarm water, and melted butter. Mix everything until a dough forms.
  • Kneading the dough:Transfer the dough to a floured surface and knead for about 8-10 minutes until it becomes smooth and elastic. If the dough is too sticky, add a little more flour, but avoid adding too much
  • First proofing:Place the dough in a lightly greased bowl, cover it with a clean cloth, and let it proof at room temperature for about 4-8 hours, or until it has doubled in size.
  • Shape the pretzels:Preheat your oven to 425°F (220°C) and line a baking sheet with parchment paper.Punch down the dough and divide it into equal-sized pieces. Roll each piece into a long rope, about 20-22 inches (50-55 cm) in length. Form the rope into a pretzel shape by creating a U-shape, then crossing the ends over each other and pressing them down into the bottom curve of the U.
  • Boiling the pretzels:In a large pot, bring the water to a rolling boil, then add the baking soda. Carefully place each pretzel into the boiling water, boiling them for about 30 seconds on each side. Use a slotted spatula to remove the pretzels from the water and place them on the prepared baking sheet.
  • Baking the pretzels:Sprinkle the pretzels with coarse sea salt or pretzel salt. Bake them in the preheated oven for 12-15 minutes or until they turn golden brown.
  • Finishing touches:Once out of the oven, brush the pretzels with melted butter for a delicious glossy finish.

Notes

This is a fun sourdough pretzel recipe. Enjoy this delicious fun recipe!
Keyword dough, pretsel, pretzel, pretzels, soft, sour, sourdough

Sign up for Free Gift below!

Homemade Banana Pudding Tacos with Handmade Whipped Cream

Here’s a fun take on a great recipe that your whole family will enjoy! This goes great with any get-together or party you are hosting. It’s a fun twist on a classic!

Banana Pudding Cinnamon Tacos with Handmade Whipped Cream

This is a delicious twist on a taco favorite! Enjoy this fun desert with your kiddos!
Print Recipe
Prep Time 2 hours hrs
Course Dessert
Cuisine Mexican
Servings 4

Equipment

  • 2 Mixing Bowl
  • 1 Sauce Pan
  • 1 Wisk
  • 1 Handmade Mixer or Kitchenaid

Ingredients
  

  • 1 Cup All Purpose Flour
  • 1 Tbsp Granulated Sugar
  • 1 Tsp Ground Cinnamon
  • 1/4 Tsp Salt
  • 1 Cup Whole Milk
  • 1 Large Egg
  • 1 Tbsp Unsalted Butter (melted)
  • Vegtable oil for Frying

Banana Pudding Filling

  • 1 Cup Whole Milk
  • 1/2 Cup Granulated Sugar
  • 3 Tbsp Cornstartch
  • Pinch of Salt
  • 2 Large Bananas (Smashed well)
  • 1 Tsp Vanilla Extract

Homemade Whipped Cream

  • 1 Cup Heavy Whipping Cream
  • 2 Tbsp Powder Sugar
  • 1 Tsp Vanilla Extract

Optional Toppings

  • Sliced Bananas
  • Vanilla Wafers or Graham Crackers
  • Caramel Sauce

Instructions
 

  • In a medium bowl, whisk together the flour, granulated sugar, ground cinnamon, and salt.
  • In a separate bowl, whisk together the whole milk, egg, and melted butter.
  • Gradually add the wet ingredients to the dry ingredients, whisking until the batter is smooth and no lumps remain.
  • Heat about 2 inches of vegetable oil in a deep saucepan or skillet over medium-high heat until it reaches 350°F (175°C).
  • Carefully drop spoonfuls of the batter into the hot oil and fry until golden brown and crispy, about 2-3 minutes per side.
  • Remove the cinnamon shell tacos from the oil and drain them on paper towels. Allow them to cool completely.

Banana Pudding Filling

  • In a medium saucepan, whisk together the whole milk, granulated sugar, cornstarch, and pinch of salt.
  • Place the saucepan over medium heat and cook, stirring constantly, until the mixture thickens and starts to bubble.
  • Remove the saucepan from the heat and stir in the mashed bananas and vanilla extract until well combined.
  • Transfer the banana pudding filling to a bowl and let it cool to room temperature. Cover with plastic wrap, making sure the plastic wrap touches the surface of the pudding to prevent a skin from forming. Refrigerate until chilled.
  • Homemade Whipped Cream
  • In a large mixing bowl, combine the heavy cream, powdered sugar, and vanilla extract.
  • Using an electric mixer, whip the cream on high speed until stiff peaks form.

Assembling the Banana Pudding Cinnamon Shell Tacos

  • Take a cooled cinnamon shell taco and spoon some of the chilled banana pudding filling into it.
  • Top with a dollop of homemade whipped cream.
  • Optionally, garnish with sliced bananas, crushed graham crackers or vanilla waffers and a drizzle of caramel sauce.

Notes

This is a fun summer dessert that you and your family will love! It’s a fun twist on a classic taco favorite. Enjoy!
Keyword banana pudding, bananas, cinnamon rolls, pudding, tacos

Sign-Up for a Free Gift Below!

Ultimate Summer Reading List: Must-Read Books for Kids of All Ages

Summer is a great time for kids to dive into the wonderful world of books and explore new stories, characters, and ideas. Whether they are looking for adventure, mystery, fantasy, or heartwarming tales, here is a handpicked selection of must-read books for kids of all ages. This ultimate summer reading list will surely keep young readers entertained throughout the sunny days. Having kids read books helps them continue to learn as the are hanging out in the summer.

  1. “The Chronicles of Narnia” by C.S. Lewis Step into the wardrobe and enter the enchanting world of Narnia, where talking animals, mythical creatures, and epic adventures await. It’s a great classic for any child’s library it’s a series that follows children as they discover the enchanting world of Narnia. It will keep your reader entertained for hours. Here’s the link to finding your copies!

2. “Charlotte’s Web” by E.B. White Join Wilbur the pig and his friend Charlotte the Spider in this heartwarming story about friendship, bravery, and the power of words. Charlottes Web is a classic story of bravery and friendship that goes beyond what someone looks like. It’s a cute farm tale that any kiddo will love to read about. Here’s the link to the book!

3. “The Secret Garden” by Frances Hodgson Burnett Explores the hidden wonders of a neglected garden as two young children discover the magic of nature and the healing power of friendship. This is a great classic that every kid will want to read. It’s a sweet tale about friendship and how it can bring healing. Here’s the link check it out!

4. “Matilda” by Roald Dahl Meet Matilda, a young girl with extraordinary powers and a passion for books, as she takes on the formidable Miss Trunchbull and finds her place in the world. Matilda is a great story for kids that are a little bit of an adventurer. Here’s the books link check it out!

5. “Charlie and the Chocolate Factory” by Roald Dahl Join Charlie Bucket as he embarks on a once-in-a-lifetime adventure inside Willy Wonka’s mysterious chocolate factory. This book is a classic every kid will love the ideas and imagination that goes into this book all about candy and lessons learned. Here’s the link to enjoy!

6. “The Lightning Thief” by Rick Riordan Discover the world of Greek mythology as Percy Jackson, a demigod, embarks on a quest to prevent a war among the gods. This is a fun coming of age tale based on the greek mythology idea. It’s a fun take on an old mythology. Here’s the link so you can check it out!

7. “A Wrinkle in Time” by Madeleine L’Engle follows Meg Murry and her companions on a thrilling journey through space and time as they try to rescue Meg’s father and save the universe. It’s a fun story with life lessons along the way. It’s a great way to promote family and the bond that lasts through time and space.

8. “The Hobbit” by J.R.R. Tolkien Join Bilbo Baggins on an epic quest to reclaim the lost treasure of the dwarves from the fearsome dragon, Smaug, in the magical world of Middle-earth. This is a fun tale full of adventure and your kids will love this book! Here’s a link to where you can find it.

9. “Wonder” by R.J. Palacio Follow the inspiring story of August Pullman, a boy with a facial deformity, as he navigates the challenges of starting school and teaches others about acceptance and empathy. This is such a special story of how to be resilliant in the midst of difficulties. No matter what we look like on the outside we are deserve to be treated with love and dignity. Here’s the link to this great book!

10. “Moby Dick” by Thomas Nelson is a great adventure classic that follows a ship captain as he goes to find the whale that took his leg. It’s a great story that can reveal the motives of our own heart. Enjoy this book through this link!

Remember, this is just a starting point, and there are countless amazing books out there waiting to be discovered. Encourage young readers to explore their interests and preferences, and don’t forget to visit the local library for more suggestions and recommendations. There are so many great books and book series out there that your kids can choose from!

Free Gift Below!

Super Simple Sour Dough Bread Recipe

If you have started the sourdough journey you know that it can be daunting and there’s so much information out there. To sift through it here’s a great simple first recipe that will help you to start down the journey of sourdough. Take baby steps and start with the starter recipe and go from there. Here’s the super simple sourdough bread recipe!

Sour Dough Bread

A simple sourdough bread recipe is a great way to enjoy your sour dough starter.
Print Recipe
Course Main Course
Cuisine American

Equipment

  • 1 Lare Mixing Bowl
  • 1 Stand Mixer
  • 1 Dough Hook
  • 1 Clean Towel
  • 1 Plastic Wrap
  • 1 Perchement Paper

Ingredients
  

  • 1 Cup active sourdough starter (100% hydration)
  • 3 ½ Cup bread flour
  • 1 ½ Cup water
  • 2 tsp salt

Instructions
 

  • In a large mixing bowl, combine the sourdough starter and water. Stir until the starter is fully dissolved in the water.
  • Add the bread flour to the bowl, reserving a small amount for dusting later. Mix the flour and water until a shaggy dough forms.
  • Let the dough rest for about 30 minutes to an hour. This resting period, known as autolyse, allows the flour to fully hydrate and develop gluten.
  • After the autolyse, add the salt to the dough. Knead the dough either by hand or using a stand mixer fitted with a dough hook attachment. Knead until the dough becomes smooth and elastic, about 10-15 minutes by hand or 5-7 minutes with a mixer.
  • Place the dough back into the mixing bowl and cover it with a clean kitchen towel or plastic wrap. Let it rise at room temperature for about 4-6 hours, or until it has roughly doubled in size. You can also let it rise overnight in the refrigerator for a slower fermentation process and enhanced flavor development.
  • Once the dough has risen, transfer it to a lightly floured surface. Gently shape the dough into a round or oval shape, being careful not to deflate it too much. You can also create tension on the surface by folding the dough a few times.
  • Place the shaped dough onto a parchment paper-lined baking sheet or a well-floured proofing basket (also known as a banneton). Cover it loosely with a kitchen towel and let it rise for another 1-2 hours at room temperature, or until it has visibly expanded.
  • Meanwhile, preheat your oven to 450°F (230°C). If you have a Dutch oven or a baking stone, place it in the oven to preheat as well.
  • Once the dough has finished its final rise, carefully transfer it to the preheated Dutch oven or baking stone. If using a Dutch oven, you can place the dough on a piece of parchment paper and then lower it into the pot.
  • Score the top of the dough with a sharp knife or a bread lame to create steam vents and decorative patterns.
  • Cover the Dutch oven with its lid or use a large heat-proof bowl to cover the baking stone. This helps create a steamy environment for the bread.
  • Bake for 20 minutes with the lid or cover on. Then, remove the lid or cover and bake for an additional 20-25 minutes, or until the bread develops a deep golden brown color and sounds hollow when tapped on the bottom.
  • Once baked, transfer the bread to a wire rack and let it cool completely before slicing.

Notes

Here’s a super simple basic version of a sourdough bread recipe. Enjoy the fun process of discovering the power of sour dough!
Keyword bread, sour dough

Sign Up for a Free Gift Below!

Exploring Nature: 5 Exciting Outdoor Activities for Children This Summer

Summertime is the perfect season for children to step outside and connect with the wonders of nature. Encouraging kids to explore the great outdoors not only provides them with a sense of adventure but also promotes their physical, mental, and emotional development. In this blog post, we’ll dive into five exciting outdoor activities that will spark their curiosity and help them create lasting memories this summer.

1. Scavenger Hunt in the Wild: Organize a thrilling scavenger hunt for children to embark on a nature expedition. Create a list of items they need to find, such as different types of leaves, rocks, insects, or flowers. Give them a magnifying glass and a field notebook to document their discoveries. This activity not only engages their observation skills but also teaches them about the diverse elements of nature. Make sure to help them identify any poisonous or dangerous plants or insects ahead of time so they won’t add that to their collection. This is a great way to introduce the topic of why nature is important and how we can appreciate nature by taking care of it. Introduce ideas of plant and animal life cycles and how they contribute to the ecosystems that we live in.

2. Nature Photography Safari: Transform kids into budding photographers by introducing them to the world of nature photography. Equip them with a digital camera or even a smartphone with a decent camera. Encourage them to capture the beauty of flora, fauna, landscapes, and unique textures they encounter. Afterward, gather to admire their photographs and discuss the stories behind each image. This is a fun way to show children about lighting and details while taking a picture. Ask them specifically why they chose their subject matter and why it’s important that we capture these images.

3. Create a Nature Journal: Encourage children to keep a nature journal throughout the summer. Provide them with a blank notebook and art supplies. They can sketch and describe plants, animals, and natural phenomena they come across during their outdoor adventures. This activity fosters their observation skills, enhances their creativity, and cultivates a deeper appreciation for the environment. You can ask them daily questions like what do butterflies do when they land on flowers? Where do ants go when they find food? Challenge them with daily questions about the creatures and plants they find throughout the day.

4. Build a Miniature Garden: Let kids unleash their creativity by building their very own miniature garden. They can use a small planter or a designated garden area. Provide them with various plants, rocks, mini figurines, and other decorative elements. This hands-on activity allows them to understand the basics of gardening, take responsibility for their little ecosystem, and watch their plants grow over time. Fairy gardens are so common now and are a great way to put a little fun into the miniature worlds that the kids want to create. Have them use their imagination as they create small villages or gardens. Here’s a cute kid from Amazon with multiple pieces to get you started!

5. Cloud Watching and Stargazing: Encourage children to lie down on a blanket in an open space and observe the ever-changing clouds during the day. Ask them to describe what shapes or objects they see in the sky. During the evening, introduce them to the wonders of stargazing. Teach them about constellations, planets, and interesting astronomical events. This activity instills a sense of awe and expands their knowledge of the universe. Cloud gazing is a relaxing way to get kids excited about what they can find in the sky. If you are able to go to a place that doesn’t have a lot of city lights at night it will be easier for them to see the stars.

Engaging children in outdoor activities that revolve around nature not only helps them stay active but also cultivates a sense of wonder, curiosity, and respect for the environment. Whether they’re exploring, creating, or observing, these exciting outdoor activities will provide them with unforgettable experiences and foster a lifelong connection with the natural world. So, gear up and embark on a summer adventure with your little ones!

Sign Up For Free Gift!

How to Make and Maintain a Sourdough Starter: A Step-by-Step Guide

Sourdough bread has gained immense popularity in recent years, with its tangy flavor, chewy texture, and rustic appeal. The key to making delicious sourdough bread lies in a healthy and robust sourdough starter. In this blog post, we’ll walk you through the process of creating and maintaining your own sourdough starter, ensuring that you have a steady supply of homemade sourdough bread at your fingertips. As I have just started my own sourdough journey I wanted to record all of the tips and tricks I have found along the way. Enjoy!

Sour Dough Starter and Maintenance

Here's a great starter recipe and maintenance information for sourdough.
Print Recipe
Course Side Dish
Cuisine American

Equipment

  • 1 Glass Mason Jar Large
  • Measuring Cups
  • cloth or plastic wrap

Ingredients
  

  • 100 grams Whole Wheat Flour
  • 100 grams All-Purpose Flour
  • 200 ml Water

Instructions
 

  • Day 1: In a clean glass jar or container, combine 50 grams of whole wheat flour and 50 grams of all-purpose flour.
  • Add 100 milliliters of water to the flour and mix well until there are no dry lumps. Ensure the mixture has a consistency similar to a thick pancake batter.
  • Cover the jar loosely with a clean cloth or plastic wrap and let it sit at room temperature (around 70-75°F or 21-24°C) for 24 hours.
  • Day 2: After 24 hours, you may notice some activity in your starter, such as small bubbles or a slightly sour smell. Discard half of the starter (approximately 100 grams) and add 50 grams of whole wheat flour and 50 grams of all-purpose flour. Add 100 milliliters of water and mix well.
  • Cover the jar again and let it sit at room temperature for another 24 hours.
  • Day 3 and onward: Repeat the process of discarding half of the starter and feeding it with equal parts of whole wheat flour, all-purpose flour, and water every 24 hours. As the starter develops, you'll notice more activity and a tangier aroma. This process usually takes around 7 to 10 days.

Notes

Part 2: Maintaining Your Sourdough Starter
Once your sourdough starter is active and bubbly, you’ll need to maintain it regularly to keep it healthy and vigorous. Here’s how:
Feeding Schedule:
  • Daily Feeding: Discard half of the starter and feed it with equal parts (by weight) of flour and water. For example, if you have 100 grams of starter, discard 50 grams and add 50 grams of flour and 50 milliliters of water.
Storage Options:
  • Room Temperature: If you bake with your starter frequently, you can store it at room temperature and feed it daily. Keep it in a glass jar with a loose lid or cover to allow airflow.
  • Refrigerator Storage: If you use your starter less frequently, you can store it in the refrigerator. Feed it as usual, and then transfer it to the refrigerator immediately after feeding. The cold temperature will slow down the fermentation process, and you’ll only need to feed it once a week.
Troubleshooting Tips:
  • If your starter develops a strong, unpleasant smell or turns pink or orange, it may indicate that it has gone bad. In such cases, discard the starter and start the process again from scratch.
  • If your starter separates into a liquid layer on top and a dense layer at the bottom, it’s called “hooch.” Pour off the liquid and feed the starter as usual.
  • If your starter becomes less active or doesn’t rise as much as before, it may need more frequent feedings or a larger feeding ratio.
  • Making and maintaining a sourdough starter is a rewarding process that allows you to explore the world of sourdough baking.
 
Keyword bread, dough, sour, sour dough, sourdough, start, starter

Sign Up for a Free Gift below!

  • « Previous Page
  • 1
  • 2
  • 3
  • 4
  • 5
  • 6
  • …
  • 10
  • Next Page »
  • Facebook
  • Instagram
  • Pinterest

aileen@aileenfoos.com

Hi!
My name is Aileen! I'm a hard working single mom who loves to share tips, tricks and recipes with my friends. Come follow me on an adventure through parenting and life! Read More…

FREE GIFT!

Categories

The Single Mom Life

Copyright © 2025 The Single Mom Life A way for single moms to connect, relax, and have an adventure!